
Thursday, August 15, 2013
Sunday, August 11, 2013
Layering Decor
Layering decor is a great way to add visual interest and allows you to use all your favorite pieces you may not have room for otherwise. I loved this canvas art with my favorite Bible verse printed on it, but didn't have a spot for it. So we decided to layer it. It's not covering any of the pictures yet rests nicely on the frames. My husband and I love layering. If you're more of a minimalist this may not be your thing which is okay, but if you are bored with regular decorating, try challenging yourself. What can you layer and still keep peace and harmony with the flow of your house. It's really a lot of fun. The key is not letting it look forced.

( Rustic teal accent piece in our dinning room. Canvas art and dried yellow birthday roses layering our picture collages. I'm still shopping around for a better lamp. I found this in the closet and used it as a stand in, until I find something else. This is such a cute little space in the evenings with the glow of the lamp. )

(Apothecary Chest in floral green. I love dried roses. I think they are romantic and whimsical. The glass vase allows us to layer because it's see through and airy, not heavy, almost like it's not there and seeing the dry stems add texture and an earthy element.)

(My favorite Bible verse! It's the truth. Acknowledge HIM and He really will direct your path.)
Saturday, August 10, 2013
Dining room
Our dining room continues to transform. Check out our new window treatment for the French doors.


(When we moved in)

(after we refinished the floors and painted)

(Before we changed the blinds on the French doors)
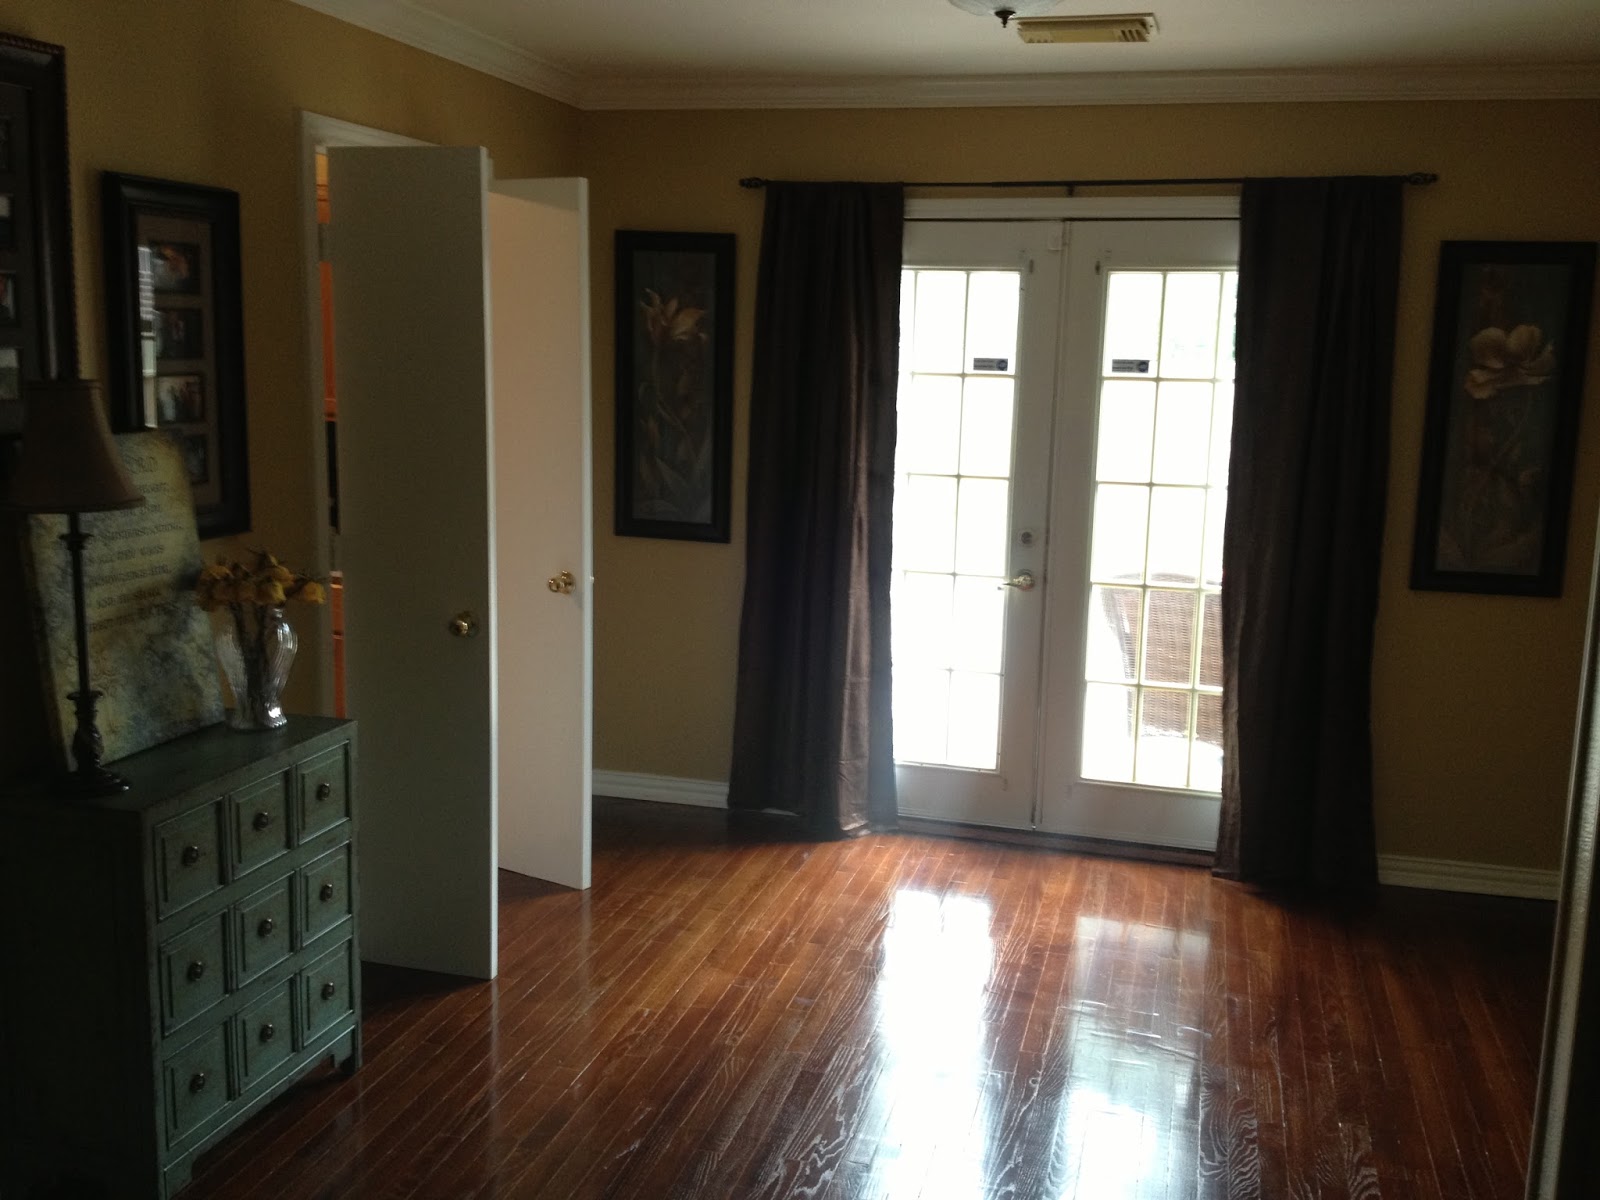
(we changed the blinds on the French doors. We love having curtains instead. Now we can see the entire deck area, and block the heat of the sun in the afternoon.)
Tuesday, August 6, 2013
What's IN - Rustic Iron Wood Windows

Paint color is Burnt Almond by Behr


Paint color is Pebble Path by Behr
They fill empty wall space beautifully without closing off the space. You can also stand some styles on your fireplace mantel and layer decor in front of them like candles etc. Simply beautiful. I love the rough yet elegant look of these.
Monday, August 5, 2013
Guest Closet Makeover
I'm working on a client's guest bedroom. I can't wait to show you the before and after pictures when we are finished. While you wait I can show you the closet transformation.

(This closet has seen better days. Years of use,children's toys, clothing, art work (lol) and hide and seek games. :-)

(yikes!)

(a little paint and the transformation is complete. We painted the shelves a white acrylic, and the walls Behr's Arabian Sands)

(It's a new space! In older homes the base boards and trim are painted in a white oil based paint which turns yellow over the years. We fixed that with a white acrylic. You may have to wipe down the old oil painted surfaces with a special chemical so he acrylic will stick and not peel off. Make sure and talk to someone in the paint department.)

(The fresh white makes all the difference)
Saturday, August 3, 2013

Friday, August 2, 2013
Back Patio: Fountain and Chairs

(My husband has always wanted a fountain, but the ones he liked were kinda pricey. So we found 10+ year old one that someone was giving away for free. It was white and covered in blackish mold, so we washed and painted it Behr's April Mist which is a whitish green color.)

(Again these were free. Someone was giving away an old white set of whicker chairs. The white wasn't us, plus it was turning green. So we cleaned them and used a painted sprayer to paint them Behr's Cozumel)
 (Before the sloping. Power washing the patio)
 (I love this man!)


(Prepping the fountain area. First we sloped the area, as I shared in an earlier post. then we sprayed weed killer, laid a weed mat, and for now a flimsy plastic boarder which will be exchanged for something more elegant later down the line. )


(Then we filled it with rocks and placed the fountain on a cement slab we had laying around the yard already.)
(A reminder of where we started.)


(The umbrella finishes it off and adds much needed shade.)

(We love our little area. It was super cheap and easy to accomplish. So many people neglect their outside space, when they can make it just as enjoyable as an indoor area. Think of it as outside living. Now for a bbq grill!)

( The pink carnations were a cute idea while they lasted, but they all ended up dying. I like the area without them anyway. All we need now are some lights to string across for the evenings.)
Thursday, August 1, 2013
Back Patio: Sloping
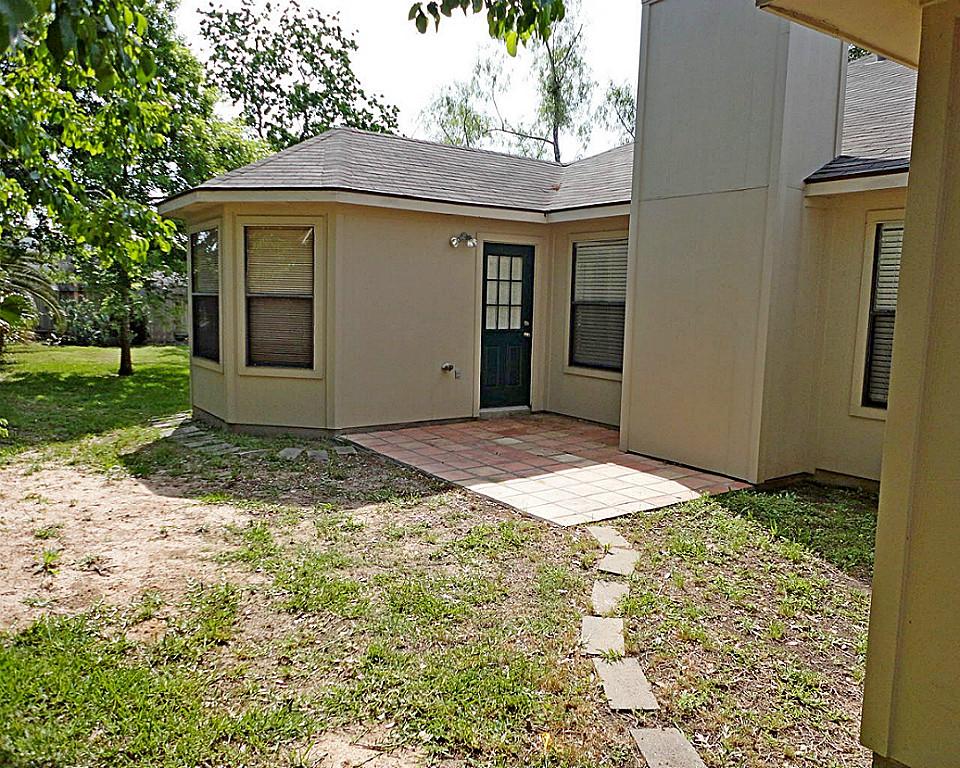
Soon after we moved in we noticed a sloping issue in our backyard patio area. We didn't know why the yard was sloped so crazy. All the rain water was basically flowing toward the house in one area. It's important to remember when doing any type of projects in your yard that the builders build the lot with a slope. A sublet tilt that causes rain water to flow away from your house and into the street. People often have issues when remodeling their yards because they forget or don't know this important information and disrupt the slope.

(This is the picture from HAR. It's hard to tell but the area with bald spot of dirt is much higher, like a little hill, which was messing up the flow of the yard. All back yards have a slope that leads water away from the house. In this case the water was being pushed back into the corner. Also there were no gutters which added to the issue. So we installed gutters which protect your foundation from damage.)

(Picture of water collection)

(More water collection)

(Yikes, right?!?! As you can see we tried digging an opening which only made the situation worse because of the sloping issues.)

(Scary for a woman, seriously. But the guys knew what to do.)

(My dad was a surveyor for a few years, also worked as a diver and civil engineer, so this was nothing for him to figure out. He layed out wooden stakes and strings across the yard to determine the slop. Then started cutting and scalping the ground. We used the top grass parts as sod in dead areas of the yard *smart idea*)

(My hubs and dad digging out the high parts and using the dirt to fill in the low area that was filling with water)


After the digging and moving of dirt was finished we let the ground settle, then bought some sod to fill in the scalped area. We had professionals install gutters. When all that was finished we started our next project....a relaxing fountain area.
Subscribe to:
Posts (Atom)